Detailed Results
The Detailed Results tab shows information about each detected issue. To switch between the issues of different scans, use the scan list in the upper-right corner.

Figure 5.37: Detailed results
The left part of the page shows a list of issues grouped by type. You can select the level of issues to be displayed in the header. If you like, you can change the grouping method to:
- by file
- by package
- by issue type
To facilitate navigation, type the issue or the file name in the search bar, or use filters.
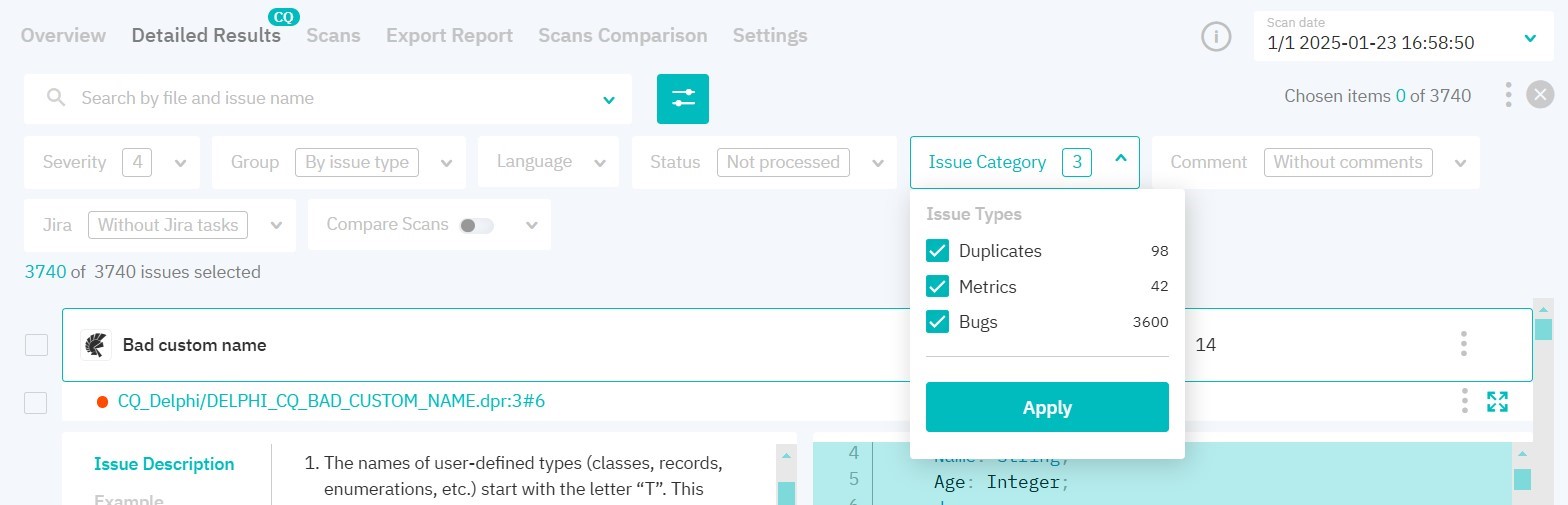
Figure 5.38: Results filters
You can filter results by the following parameters:
-
Issue statuses to display:
- confirmed
- not processed
- rejected
-
Issue category:
- duplicates — occurrences of code duplicates, grouped by language and location in the source code
- metrics — occurrences where code quality metric thresholds are exceeded, grouped by metric name, similar to the Overview tab
- bugs — occurrences similar to static analysis results, grouped by language and type
-
If there are two or more successful scans in a project, you can compare the current scan with any of the previous ones and display vulnerabilities according to status. To do this, select the appropriate settings:
- new vulnerabilities — selecting this option will display new vulnerabilities compared to the scan selected from the list.
- remaining vulnerabilities — selecting this option will display the vulnerabilities found in the preceding scan selected from the list.
- fixed vulnerabilities — selecting this option will display vulnerabilities detected in the scan selected from the list but not found in the current scan.
-
Languages
-
Comment availability
Filters will be applied after you click Apply.
By enabling the checkbox next to the package or a specific issue, you can change their severity and status. When changing issue status and severity level, security score is recalculated. Issues with the Rejected status are not taken into account when calculating issue number and security score. When rescanning, issue statuses are saved.
After choosing a specific issue entry, the right part of the page displays the respective fragment of the source code and the name of the file in which it was detected. The left part of the page will show information about the chosen issue: Description, Example, Recommendations**, Links, and Task Manager.
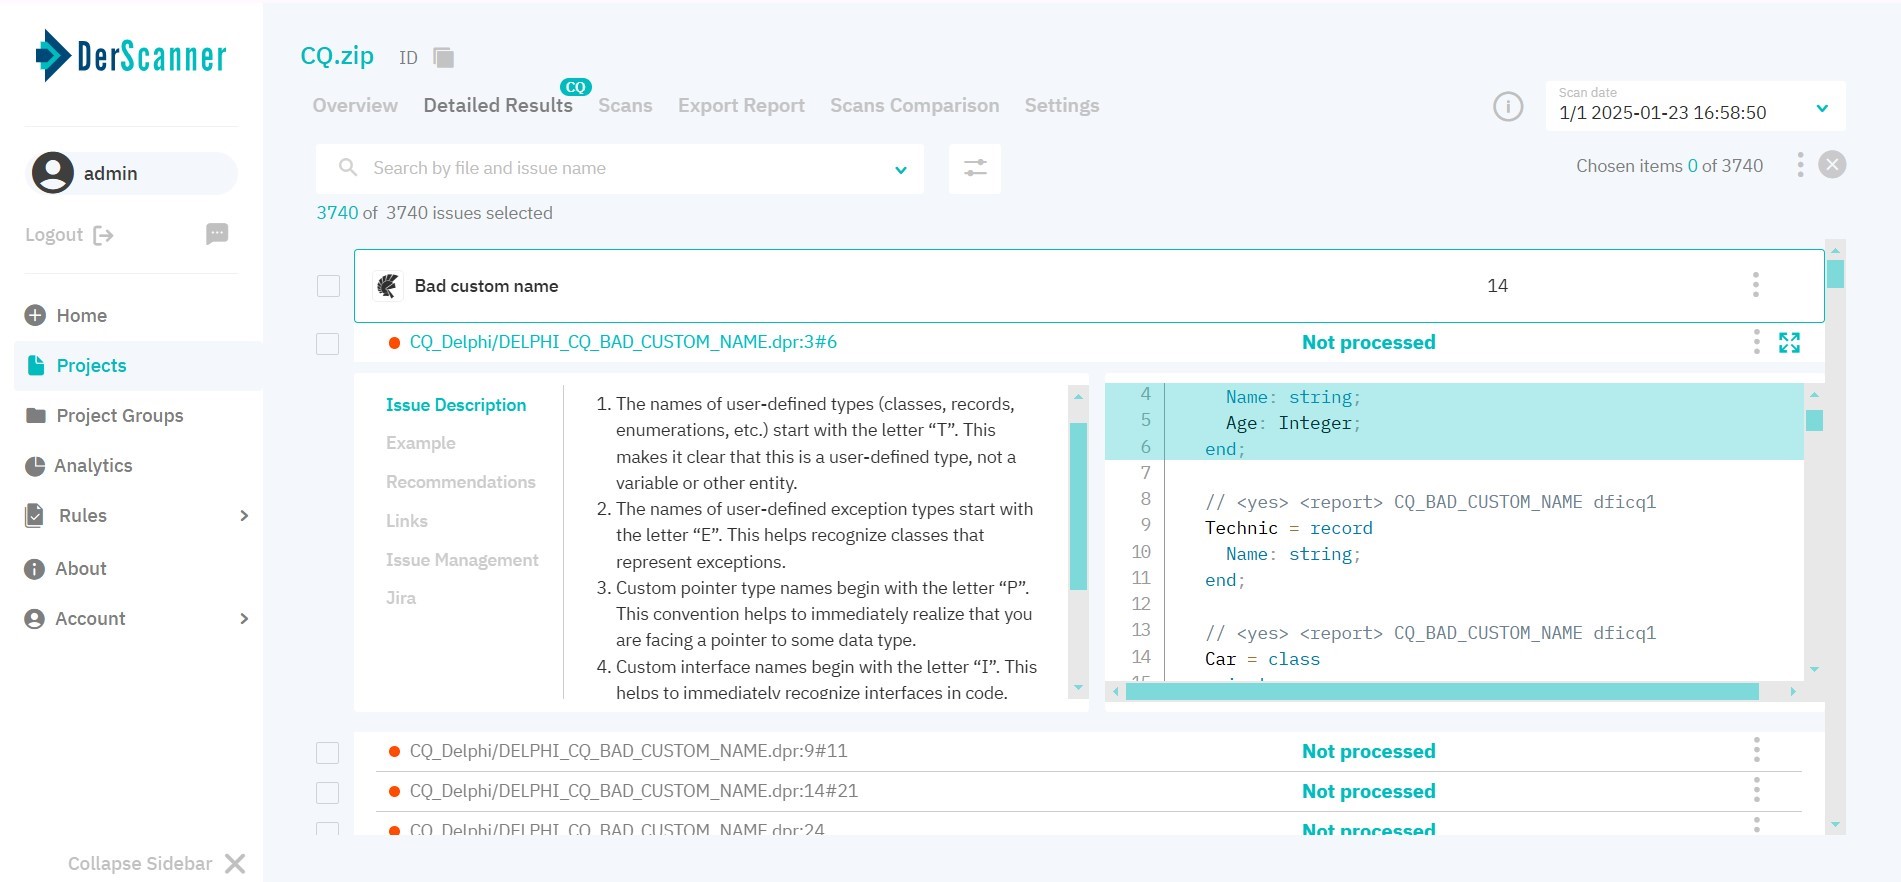
Figure 5.39: Vulnerability description
In the Vulnerability Management tab, you can change the severity level and status, add a comment to an entry, or view the event log with actions and comments left earlier.
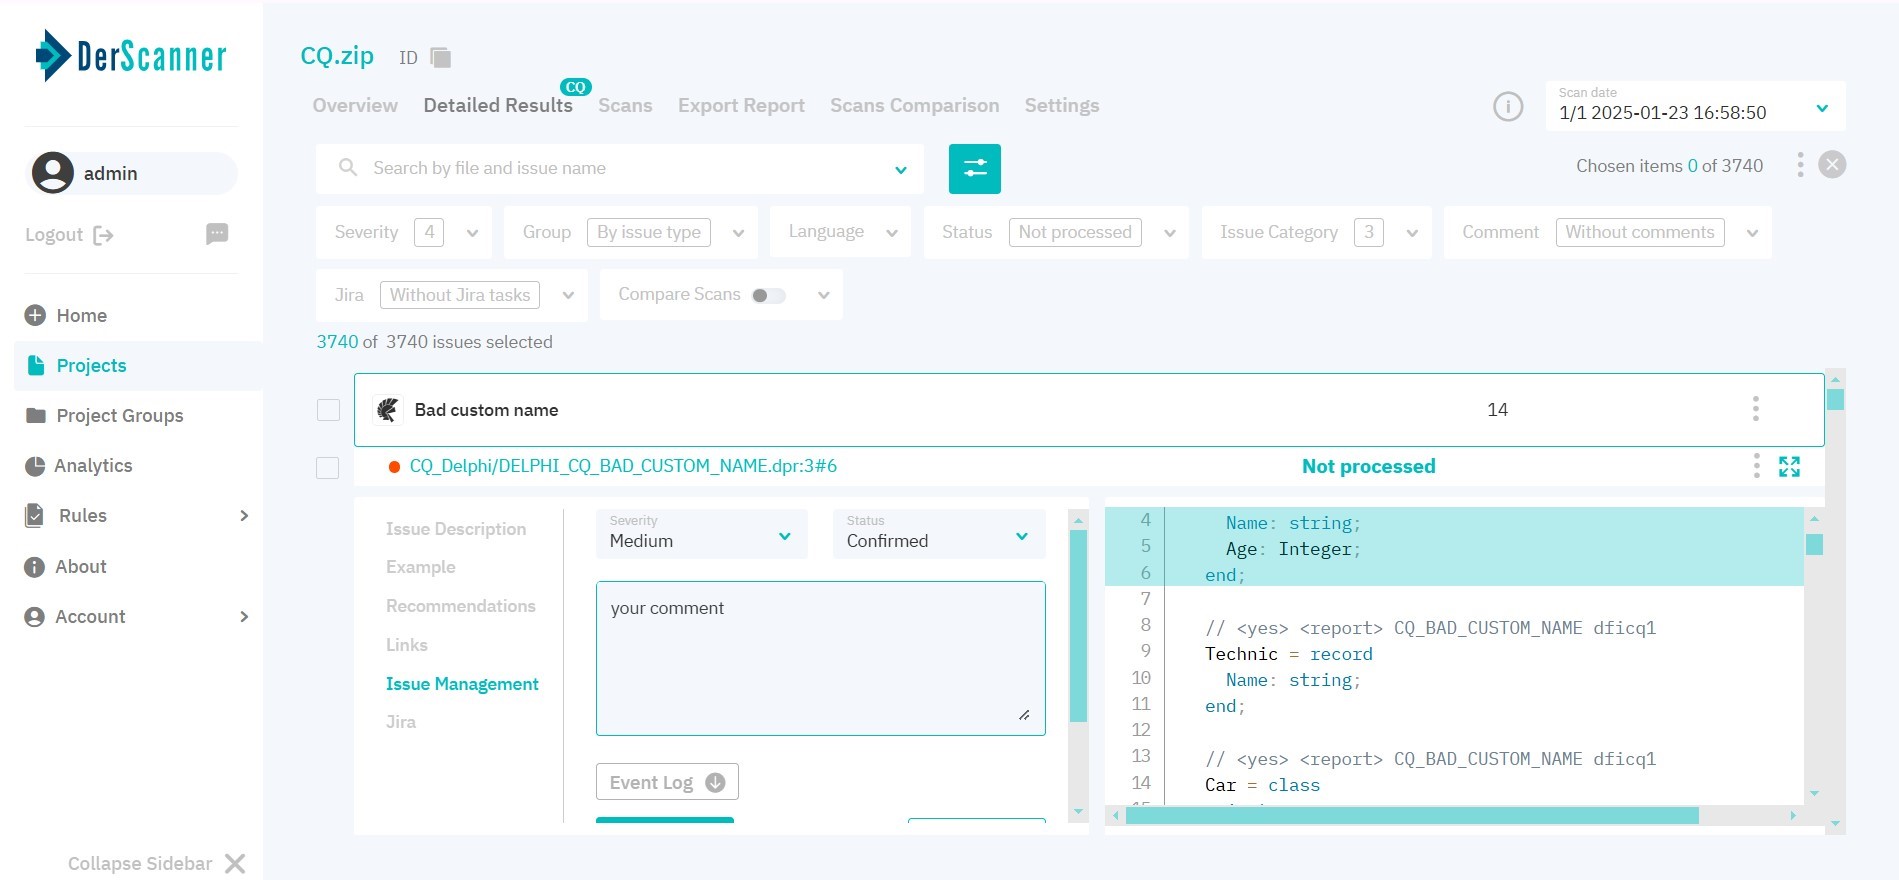
Figure 5.40: Vulnerability management